NexT主题配置手册
前言
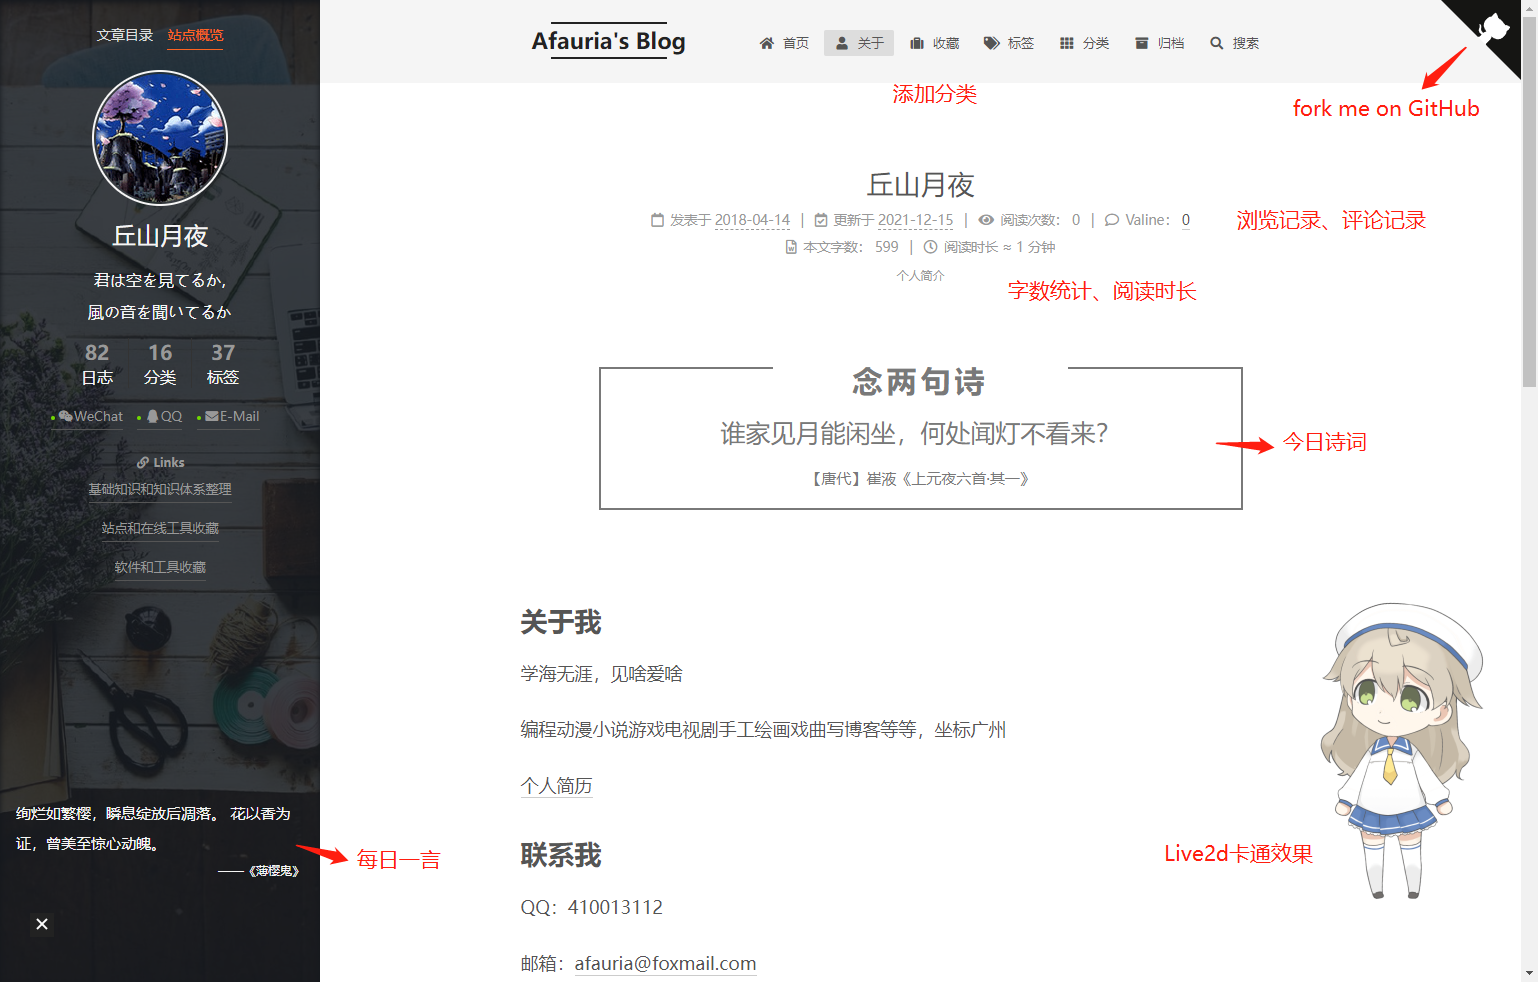
博客效果如图:
基础配置
列举部分功能,没有介绍到的可以参考主题配置文件中的注释。
添加README.md文件
在Hexo目录下的source根目录下添加一个README.md文件,修改站点配置文件_config.yml,将skip_render参数的值设置为skip_render: README.md,跳过渲染该文件
更换Schema
NexT内置了四套主题,这里叫Scheme(用一送四很划算),修改主题配置文件的scheme字段:Muse、Mist、Pisces、Gemini
1 | # Schemes |
设置头像
修改avatar字段,设置头像链接地址,如:
- 使用完整的互联网URI:
avatar: http://example.com/avatar.png - 使用相对路径,放置到
source/images/路径下:avatar: /images/avatar.png
设置菜单项
修改主题配置文件的menu字段
格式为菜单项名称(会匹配翻译): 链接 || Font Awesome图标
注:旧版本路径 ||中间有空格,升级Hexo之后跳转404,url链接多了个%20,表示空格,需要删除
示例配置
1 | menu: |
菜单项的名称并不直接用于界面上的展示。Hexo 在生成的时候将使用这个名称查找对应的语言翻译,并提取显示文本。这些翻译文本放置在 NexT 主题目录下的 languages/{language}.yml 。
例如修改简体中文配置文件:languages/zh-Hans.yml,或者添加自定义的字段other:
1 | menu: |
生成分类、标签和关于页面
首先修改主题配置文件的menu菜单项,将tags和categories的注释去掉
标签
hexo new page tags:在站点/source/目录下会生成新的文件夹tags,在该文件夹下会有一个index.md文件,头信息修改如下,不需要加正文内容
1 | title: tags |
分类
同理,将tags换成categories即可
关于
同理,自行编辑文章内容,不需要加type
添加动态背景
修改主题配置文件 themes/next/_config.yml,不同动态背景,值为true应用:
1 | canvas_nest: false |
修改文章底部标签图标
默认文章底部的标签带#号,改为图标
修改模板/themes/next/layout/_macro/post.swig,搜索 rel=”tag”>#,将 # 换成<i class="fa fa-tag"></i>
设置网站的图标Favicon
在EasyIcon中找一张(32*32)的ico图标,或者去别的网站下载或者制作,并将图标名称改为favicon.ico,然后把图标放在/themes/next/source/images里,并且修改主题配置文件:
1 | favicon: |
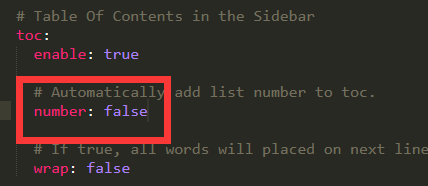
去掉NexT自带的文章目录序号
NexT会为文章自动加上目录序号,如果自己的文章里面已经加了序号,不需要自动加的话,则修改主题配置文件
进阶配置
添加搜索功能
NexT主题支持集成 Swiftype、 微搜索、Local Search 和 Algolia。Swiftype和Algolia都只有一段时间的试用期,可以采用Hexo提供的Local Search,原理是通过hexo-generator-search插件在本地生成一个search.xml文件,搜索的时候从这个文件中根据关键字检索出相应的链接。
安装插件
1 | cd hexo |
修改站点配置文件:
search:
path: search.xml
field: post
format: html
limit: 10000
修改NexT主题配置文件:
local_search:
enable: true
【踩坑】:启用搜索功能之后,使用hexo serve运行正常,点击按钮弹出搜索框,发布到GitPage,搜索框直接显示到搜索按钮旁边了。
打开浏览器开发者工具,找到html元素,查看本地和GitPage页面差异,发现两者
main.css样式不同,GitPage上搜素框css样式丢失解决:
hexo clean清除之前的编译结果,hexo g -d重新部署
添加站点地图sitemap
为了让博文被google或百度检索,需要使用hexo的sitemap功能。
- 安装插件,自动生成站点地图:
sitemap.xml、baidusitemap.xml
1 | npm install hexo-generator-sitemap --save |
hexo g -d生成并发布博客之后,可以通过博客地址/sitemap.xml、博客地址/baidusitemap.xml访问站点地图文件
Google检索
- 登录Google Search Console
- 点击立即使用,输入域名或
xxx.github.io验证资源。 - 选择HTML标记验证,如下图
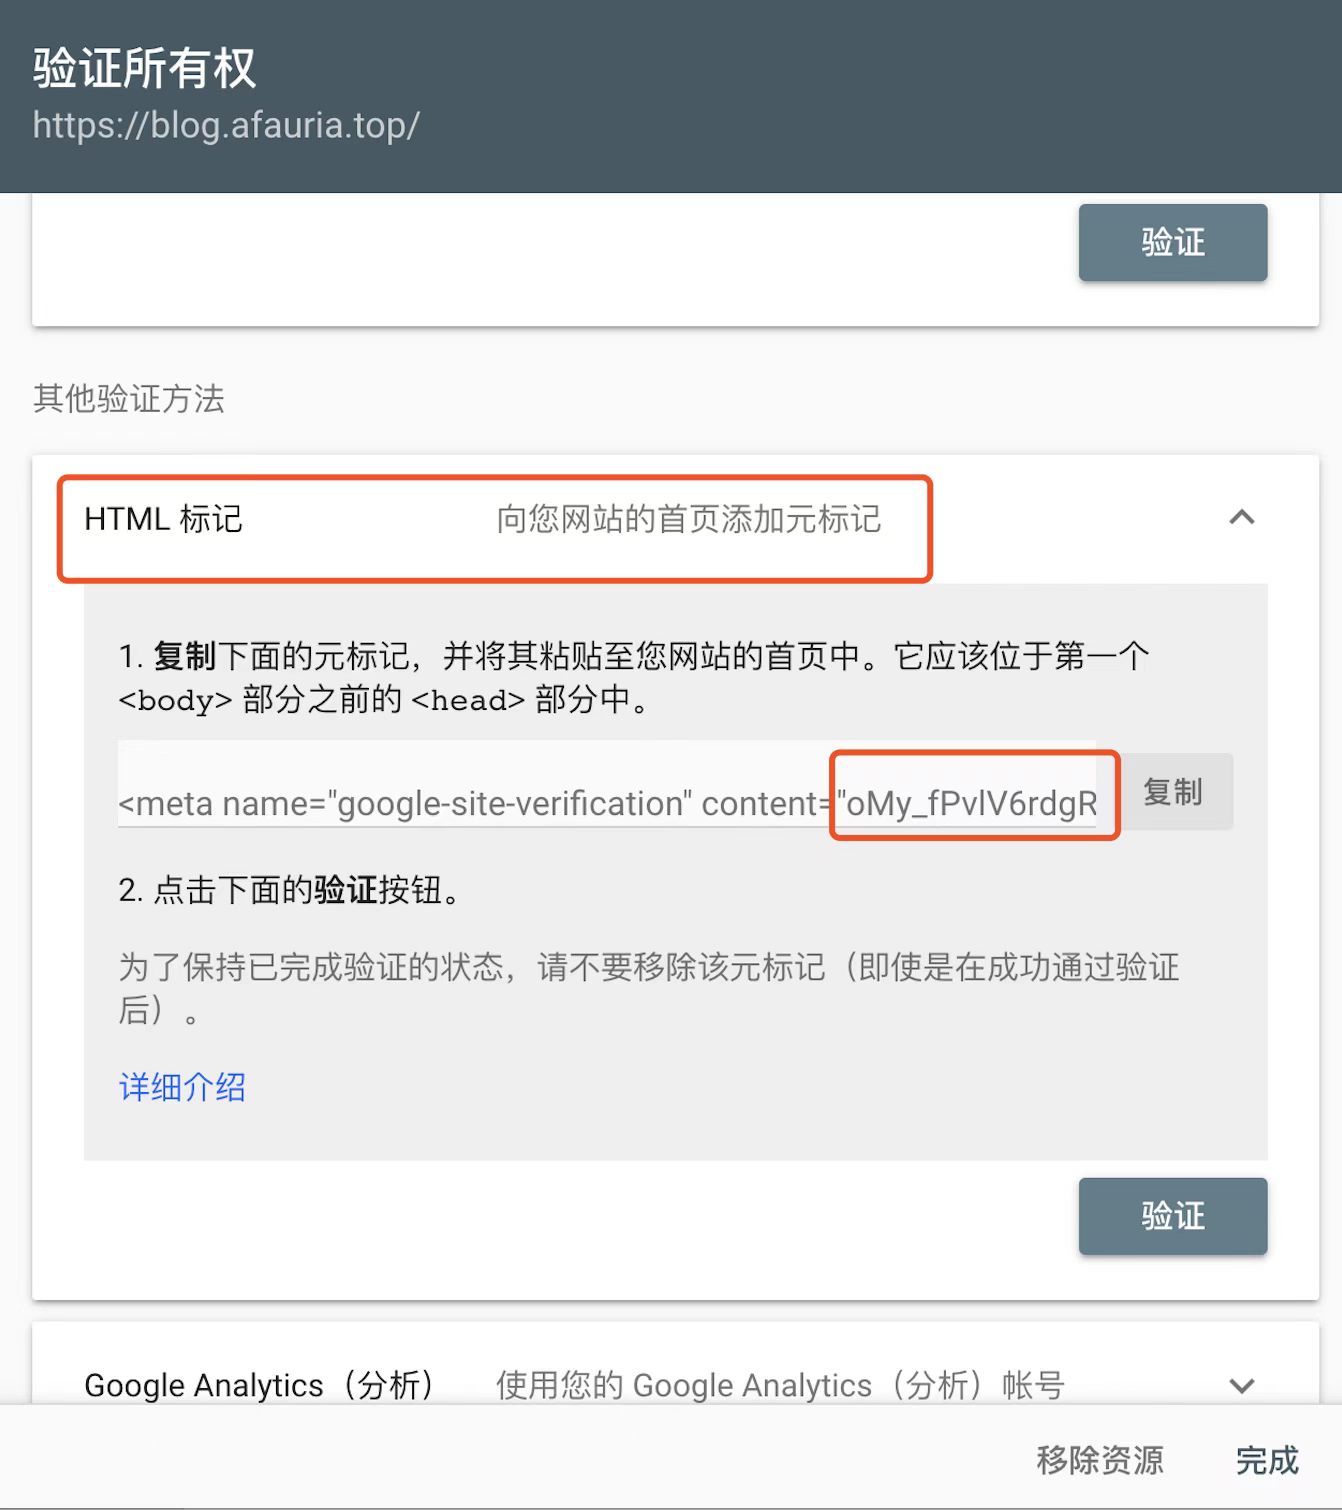
- 如果使用NexT主题,可以直接修改主题配置文件,
google_site_verification: xxx,填入content中的内容。(原理是自动帮我们在生成的静态html文件head中添加<meta>) hexo g -d重新生成并发布博客- 回到Google Search Console,点击验证
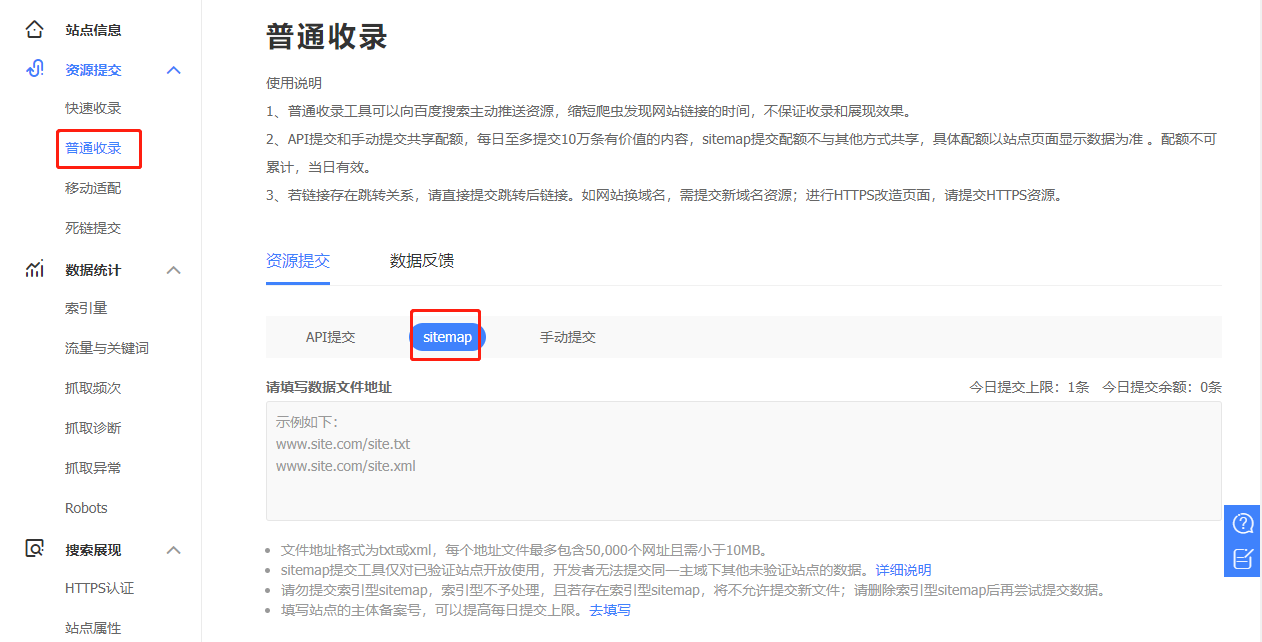
- 添加站点地图文件
sitemap.xml,如下图。过一段时间会在概述中显示被索引的情况

百度检索
- 登录【百度资源管理平台-用户中心-站点管理】
- 点击添加网站,输入博客地址
- 选择HTMl标签验证
- 如果使用NexT主题,可以直接修改主题配置文件,
baidu_site_verification: xxx,填入content中的内容。 hexo g -d重新生成并发布博客- 回到百度资源页面完成验证
- 添加站点地图文件
baidusitemap.xml,如下图。过一段时间可以查看索引数据
添加博客字数统计
- 安装插件:
npm i hexo-symbols-count-time --save - 修改站点配置文件
1 | symbols_count_time: |
- 修改主题配置文件
1 | symbols_count_time: |
【踩坑】:配置之后发现文章字数始终为空,打印post.length为undefined。最终发现因为先安装了hexo-wordcount,卸载之后需要执行hexo clean清除缓存
添加站点访问统计
修改主题配置文件,页脚会出现访问量。会和Live2d冲突。可以使用valine的visitor进行字数统计,见下文添加评论系统
1 | busuanzi_count: |
添加评论系统
注:Next新版本不再内置Valine
注:LeanCloud云服务停服,改其他方案
使用Valine(基于LeanCloud云服务)作为评论系统。(也可以用Disqus、Gitalk、Livere、畅言等)
看别人用Gitalk也挺不错的,还可以将评论发到issue,及时收到通知。缺点是需要登录GitHub账号,可能会劝退一拨人
由于busuanzi统计站点访问量会和Live2d插件冲突,因此使用Valine visitor进行访问统计。(会和leancloud_visitors冲突,打开一个就行)
步骤如下:
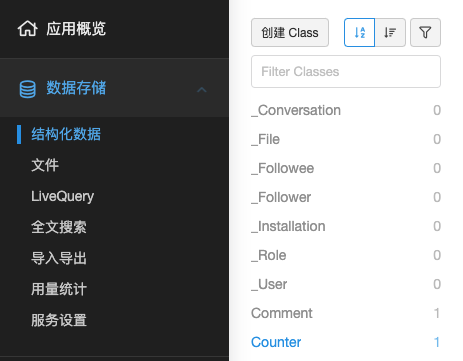
注册LeanCloud账号,实名认证进入控制台,创建应用在【设置-应用凭证】中找到appId和appKey【设置-安全中心】可以配置Web安全域名,避免别人拿到appId和appKey之后使用在LeanCloud控制台【数据存储-结构化数据】中创建Class,起名为Counter,如下图。(Comment为评论记录,Counter为访问记录)
修改主题配置文件,如下
1 | valine: |
配置Live2d卡通人物
- 安装
npm install --save hexo-helper-live2d,具体配置见官网说明hexo-helper-live2d - 安装动画model,如
npm install live2d-widget-model-koharu,可以到live2d-widget-models挑选自己喜欢的model,效果见hexo live2d插件 2.0 ! - 将下述配置拷贝到根目录
_config.yml中,不能拷到主题配置中,否则不生效。
1 | live2d: |
右上角配置Fork me on GitHub入口
方法1:
- 到GitHub Corners或者GitHub Ribbons选择喜欢的图标,copy相应的代码
- 将代码粘贴到
themes/next/layout/_layout.swig文件中(放在body的内即可) - 修改
href链接为想要跳转的地址,如GitHub主页
方法2:修改主题配置文件
1 | github_banner: |
添加每日一言/今日诗词
- 在layout或者md文档中添加下面代码。我是将今日诗词添加到了关于页面,将每日一言添加到了侧边栏:
/themes/next/layout/_partials/sidebar/site_overview.swig中
1 | <!--今日诗词--> |
- 在
/themes/next/source/css中添加下面的css样式,也可自行修改样式
1 | .poem-wrap { |
添加文章置顶功能
- 安装插件
1 | npm uninstall hexo-generator-index --save |
- 在需要置顶的文章头部中添加
top: true - 配置置顶图标:修改
next/layout/_macro/post.swig文件,在<div class="post-meta">中添加下面代码
新版本改到了
next/layout/_partials/post/post-meta.njk中
1 | <div class="post-meta"> |
置顶图标无法显示?
由于
next主题使用的fontawesome图标只有all.min.css,不包含fa-thumb-tack(图钉)图标。需要手动下载fontawesome图标,替换next/source/lib/font-awesome下的文件夹。这里就不引入了,换成
fa-fire(火)或者fa-bolt(闪电)图标,能看懂就行
修改归档页面文章数量
1 | npm install --save hexo-generator-index |
问题记录
NexT升级
Hexo升级之后使用NexT会出现一些错误,原来NexT版本为5.1.4,需要升级为V7+。
本文配置基于V5,升级之后部分配置需要相应修改。
toArray报错
hexo g生成报错,不影响使用
1 | ERROR Template render error: (e:\GitPageBlog\AkiyamaBlog\themes\next\layout\post.swig) |
修改
themes/next/layout/_macro/post.swig文件,去掉post.categories.toArray()和post.tags.toArray()中的toArray()
注:回来补充,不能去掉toArray(),否则文章开头的分类和标签无法显示……估计和node版本有关系
结语
参考资料: